Showing posts with label Crafts. Show all posts

Tuesday, August 4, 2015

GETTING MY CREATIVITY ON

 
Creative:
krēˈādiv/
adjective
adjective: creative
  1. 1.
    relating to or involving the imagination or original ideas, especially in the production of an artistic work.
I guess that would describe me (well, except for that little 'original idea' thing).  Let's just say that I get "INSPIRED"  by other people's work.
 
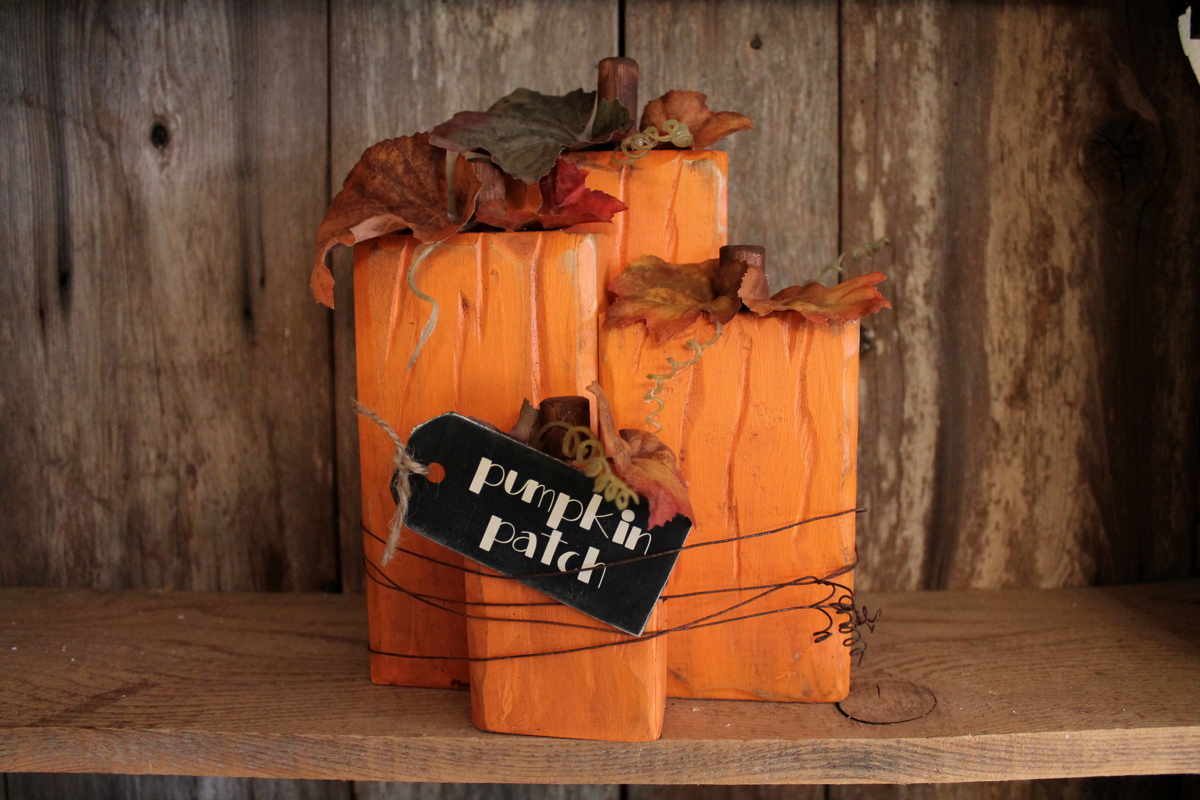
Today's post is about a few little creations I have been working on this summer in order to keep up with the sale of said items in a local salon.  I have also been itching to get some fall and Halloween items going too.


We have quite a few hobby farmers in our area so the farm related signs have sold well.


I'm loving this pumpkin set, I think I need to make a few more of them to sell.
 
 
Again, the farm theme.
 
 
Creative adventures keep me out of trouble.  Besides, like I tell my hubby, my hobby supports itself.

Sunday, November 20, 2011

I CAN'T HELP MYSELF

Pinterest went and did it to me again.  I mean seriously, how can I ever keep up with all the adorable and fantastic ideas? 

Here is a set of blocks inspired by something I saw on Pinterest.
My version:

Inspiration from Pinterest:

Here are some cute snowmen that my daughter Natasha made from some she had found on pinterest.


Here are the inspiration snowmen.


What did we do before blogs and pinterest?

I am also participating over at Creations by Kara.


”Creations

Saturday, October 8, 2011

FELT WREATH TUTORIAL

This is a very quick and easy project.  Just gather your materials together, pop in a good movie and make this wreath in about 45 minutes, start to finish.

List of materials:
2 pieces each, 9"x12" felt in 5-6 different colors
Straight pins
9" Styrofoam ring
Something approximately 2.5" round to use as a template
(I used a seasoning salt container)
scissors
 1. Trace circles onto felt and cut out.  These don't have to be perfectly round as you can see by mine.
I cut approximately 20-24 circles of each color.


2.  This is what I used as my circle template. 


 3. This is the only shot I got of the wreath form which is what the back looks like.  You could wrap the form with ribbon before putting the felt pieces on if you want a more finished look.


 4.  Fold the circle in half, kind of like a taco shell.


 5. Fold over again.
6. Push straight pin in close to the bottom point. (Please excuse the black looking fingers, I was painting earlier.)


 7.  Push into foam.  After the felt is in kind of fluff open to help hide the pin.


8.  Here is the finished wreath that Randy won.

Thursday, May 19, 2011

SPRING FLOWERS CRAFT

My May craft project for our crafty ladies group was spring flowers in gussied up container.
If you would like to see some more detailed pictures of these projects
go to my vinyl lettering blog for set by step pictures.


Punkin Seed Productions


Monday, April 18, 2011

Easter Decor

I was reminded by someone (you know who you are) that I haven't posted in almost a week and that I am to provide at least some sort of entertainment for said person.
Also to confirm that I haven't dropped off the face of the earth I thought I would throw up this quick post.

My oldest daughter made (well anyway, she attempted to make one then I butted in and did it for her) a cute Easter canvas. When my youngest daughter saw it she wanted to know where hers was.  So being the guilt ridden nice mother that I am I made one for her too.

I am not sure if you can see it but it is covered in a layer of glitter.  It was just the touch it needed.
Happy Easter!

Thursday, April 7, 2011

BUNNIES NEED CARROTS

Carrots
That is what the orange fabric was all about.

I was inspired by a post that Brenda did over at Deck The Halls of Home With Joy.
She refers to the Idea Room for the tutorial.  The only thing I did differently was when I inserted the greenery in the top of the carrot I just wrapped a thin ribbon around it and drew it up tight and tied it.  No pulling a ribbon or making a hem.


Linking up with the Easter Linky Party at Someday Crafts.

Wednesday, April 6, 2011

CRAFTIN' TIME

There's going to be some crafting at my house.  My daughter Maria is coming for a couple of days and we NEED to do us some craftin'.

Here is a hint at what we will be making...


Wednesday, March 23, 2011

A POSIE POST

Ok, I agree.  The post title is really lame.

I stalk follow a very sweet blogger and was inspired by her tutorial she had of this flower. Her name is Lori and she is a VERY talented crafter.  I always look forward to her posts, she has the best ideas.

Here is my attempt at creating these cute paper flowers.


I actually used double sided card stock where Lori used two different papers.
Be sure and go to Lori's blog for a great tutorial on making these.
THANKS FOR THE INSPIRATION LORI!

Thursday, January 27, 2011

GIVING THE MACHINE A TEST DRIVE

I bought a new sewing machine back in November and haven't even plugged it in until today.

I decided to make something simple so I started with customizing some dish towels I bought.  I added some fabric bands and some trim to dress them up. 


The first one was all black.  I added some cute fabric and some rickrack.
Very simple indeed.


The second one was red and white striped.  I added some fabric and some ribbon to pep up the personality meter.


And lastly a checkered towel got a pretty band of berries and flowers along with a ruffle

Wow, that felt good to get back to sewing again.


Punkin Seed Productions

Friday, January 21, 2011

CUTE CANVAS PROJECTS

Last year we had a craft group that met once a month and made crafts, visited, laughed, and shared munchies.
One of the crafts we did were these family canvases.

Here is Tawnya's finished project.  She has three ADORABLE boys that she took photo's of and mounted them on to thin black craft foam and glued onto the canvas.  I helped her with the vinyl lettering.
Didn't it turn out awesome


This is the finished canvas that Christine made of her four HANDSOME boys.
I love the words she chose describe her little men.


One other lady made one with photo's of her boys and a family photo but I didn't get a picture of it and she has since moved.
So Kadi, if you stop by my blog anytime soon I would love to feature your finished canvas too.
If you would be interested in making one of these here is what you need:

1-12x24 artist canvas
 { found at any craft store}
Paint of your choice for canvas
Photo's 
{3x3 or4x4 work well} 
Thin black craft foam
Glue
{like Tacky Glue or Gorilla Glue}
Vinyl lettering
{I will do custom orders, just email me at connie_hall57@yahoo.com}


Thursday, January 20, 2011

JUMPIN' ON THE WAGON

The Valentine's wagon that is...
I was inspired by this subway art at eighteen25.


I have so admired all of the cute Valentine's decorations being shared around blogland.  With so MANY, MANY talented and creative people out there that I just couldn't help but get involved myself.
(The canvas I used for this project is an 18"x18" that I actually used for a plaque for the bazaar back in November.  I had some subway art on it but it didn't sell.  Guess what, you can just peel off the vinyl, repaint the canvas and apply another design and you have a brand new sign or plaque.  This project didn't cost me anything, I just used everything I already had on hand.)
giveaways


Punkin Seed Productions
deck the halls


Happy Valentine's Day!

Saturday, January 1, 2011

FIRST CRAFT PROJECT OF 2011

Did I ever mention that I LOVE earrings? When I was twelve I got my ears pierced and have had a love affair with earrings ever since.   I just love matching earrings to whatever I am wearing, which could get very expensive if I bought them whenever I bought a new article of clothing.
A friend from church offered to teach a class on jewelry making a couple of years ago where she taught the basics of jewelry making.  That's all it took and I was hooked.

My friend Shawn stopped by just before Christmas and had me help her make a pair of earrings with some beads she had picked up at Michael's.  Then my granddaughter Addison wanted me to make some for her mom for Christmas.
Well, ANYHOOZIT, that just got my juices flowing and I went on to make eight more pairs (one pair were absent for the photo shoot, I forgot they were in the bedroom) for myself.


So that is the extent of my creativity since getting so burned out from my bazaar crafts.
Did you notice that there was no vinyl involved?  I know, that is rare for me to craft without using vinyl.

HAPPY NEW YEAR TO MY BLOGGY FRIENDS!