HOW TO BUILD A SNOWMAN
I thought I would share a tutorial on how to build a simple snowman out of wood and other simple materials.
Materials needed; 1- 4x4 post, not pressure treated. I got mine at Home Depot for around $8-$10 ( I can't remember for sure as I bought this one about 6 months ago for another project). It comes in 8 ft. lengths and you have to cut it down to size.
I cut the main body in a 9.5" length
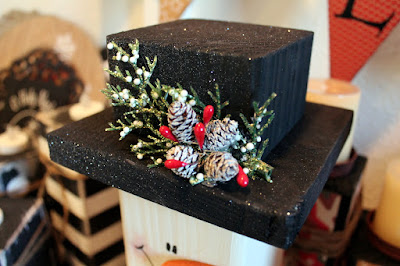
The hat consists of a 1"x6" pine board cut 5.25".
The top of the hat is another piece of the 4x4 cut to 2 inches.
This is how it is stacked. But first paint the main body of the snowman with white paint. I used Apple Barrel, white 20403E. The bill and the top are painted black using Apple Barrel black 20404E.
Here are the extra supplies needed:
A piece of fabric (cotton works well) cut 3"x 25" folded in half lengthwise for the scarf. I tore the fabric rather than cutting for a rustic and frayed look.
Fabric, sprig of greenery, a bunch of mini pine cones and a calligraphy pen to draw the face. You could use a Sharpie to draw the face on the snowman too
I hot glued the hat decorations on the bill.
The nose is something I cut using my scroll saw. You could also paint a cute nose right on the face using orange paint. I usually draw the face with a pencil first so I get it just right.
A quick spray of Glitter Blast is the finishing touch.
Oh ya, some mismatched buttons are glued down the front also.
THIS PARTICULAR SNOWMAN IS PART OF THE INVENTORY I HAVE BEEN WORKING ON FOR MY ANNUAL BAZAAR.


