Saturday, May 29, 2010

Teachers Gifts

My daughter, Maria, is visiting for the weekend and we decided to make some teachers gifts for her kids' teachers.

This one was inspired by another blogger (unfortunately I can't remember who it was, if someone knows who it is let me know so I can give credit).
We just used 8x10 canvases and glued scrapbook paper down then added vinyl lettering and some embellishments.This one is for a teacher that LOVES the Twilight series so we did a Bella and Edward twist to it.

It is so fun to have somebody come over and play in my new craft room with me. So much fun.


There's a party at Funky Junk's blog, go check out the great ideas.Funky Junk's Saturday Nite Special

Friday, May 28, 2010

A Sailor's Delight

Have your ever heard the saying:
RED SKY AT NIGHT,
A SAILOR'S DELIGHT
RED SKY AT MORNING
SAILORS TAKE WARNING?
This is what the sky looked like at 9 pm. at my house last night. Natures art, you just can't beat it.


Amazing

Wednesday, May 26, 2010

PHOTO HOLDERS

I had somebody order fourteen of these cute photo holders that are made from large wooden clothes pins.
I just cut scrapbook paper to fit and glued it on with Elmers glue. I then took a black ink pad and brushed the edges. Then I added the custom names. EASY PEASY!

There are a couple of different sizes that the clothes pins come in. These happen to be 2" wide by 9" long.


These would make great father's day gifts for dad's desk. Just pick some scrapbook paper to fit his personality and add a photo.

Added Note: I bought the clothes pins at Craft Warehouse in Vancouver, Washington. I think they are only located in the North West (Oregon and Washington). Check at your local craft store or try Provo Craft.

There have been some changes at Creations by Kara. Check it out and browse the links that have joined the Look What I Made party


Sunday, May 23, 2010

I Love This Quote

This quote sums up my feelings about being creative. It is by Dieter F. Uchtdorf, a leader in the church I attend. It now hangs in my craft room to remind me of what my soul yearns to do.

Saturday, May 22, 2010

Table And Chair Re-Do

After getting my craft room findished I discovered that I needed a flat work surface that I could sit down and work at other than the computer desk. The rolling cart/work table offers a great large work space but I have to stand up to work on it. I have a rectangular folding table that would work well but...


This is what it looked like. NOT PRETTY!I saw on a blog recently where someone took apart a table like mine and recovered it in oil cloth. (If anybody knows who it was please let me know so I can give her credit for my inspiration.) Update: Melinda found the blog that was my inspiration; it is Dirt Cheat Decorating Diva's. {thanks Melinda}
Anyhoozit, I decided to take my table apart and cover it with some upholstery fabric, (I couldn't find oil cloth). For some reason I really like polkadots lately so that was what I chose.

It really was quite easy to take apart, just unscrew the brackets around the edge and the top came off easily enough. I just discarded the old fake leather and layed the board down on my piece of fabric and stapled it together. Then you just reattach the screws to the brackets. I think I will spray it with Scotch Guard to protect it from stains and spills. (I seem to do that a lot.)


Here is the table frame without the top in it.


I then decided that this old gray computer chair just wouldn't do.

You guessed it...it got a makeover too. Here is the before.


Both of them look MUCH better.


So now I have my sit down work area.


Thanks for stopping by and come back soon.


Hooking up here:

Funky Junk's Saturday Nite Special

and here


Friday, May 21, 2010

From Cupboard Door To Menu Board

I found this cupboard door recently at the ReStore (Habitat For Humanity) for$1.00. I figured there was something I could do with it. I decided to make it into a menu board to sell in the craft bazaar. Here was the condition it was in to start with. It was water damaged on one end so I knew I would need to sand it down.
After sanding I applied a coat of primer (Kilz) and let it dry.
I taped off the frame and sprayed chalkboard paint on the center section.

I then removed the tape from the edges and taped paper to the center section so I could spray the frame (I forgot to take a picture of this step).


I added the vinyl lettering and some black upholstery tacks to the frame for interest.


Because there were eight sections it left a space so I thought I would make a "requests" space. I am always up for ideas from others. I have joined up with Poppies at Play for some linky fun.


.

...and at Along For The Ride


And Between Naps On The Porch

Wednesday, May 19, 2010

Finally My Dream Has Come True

I wasn't going to post about my craft room until it was all finished but............


1. The trim around the window needs to be finished...

2. I don't know when hubby will get around to it (he has been working a lot of overtime lately)...

3. I wanted to make curtains to put up, but...

4. My sewing machine died...

5. I can't afford a new sewing machine because the refrigerator in our travel trailer went out and if we want to go on any sort of vacation this summer it needs to be replaced (at about $1,400.00).

Sooooooooooooo, to make a long story short, who needs curtains and trim up to craft anyway?
Poor naked window!
It will have to wait, cause
I can't wait any longer to get back to crafting.
{patience was never my strong suit}

WELCOME TO MY CRAFT ROOM


This is looking from the far side of the room back to the doors.

The view of the other side


The view from the door.


My little music corner. Gotta have some tunes or talk radio going to keep me company.


My work area for doing the vinyl lettering


This is the work table/rolling cart that my son made me. LOVE IT!


Storage baskets in the work table. These make a wonderful place to store things like ribbon. Ahhhhh, ribbon.


More ribbon.


And still more ribbon. I get a giddy feeling just seeing all that ribbon lined up.


I bought this cute ribbon/craft shelf at Michael's.

(Yes, more ribbon.)


More beautiful shelves to fill up.


Jars full of ribbon pieces.


(I know, I know, I have a serious addiction to ribbon. It's a sickness I tell ya.)


These are the shelf units I use for displays at the bazaar/craft show. They make a great place to store stuff in the mean time.
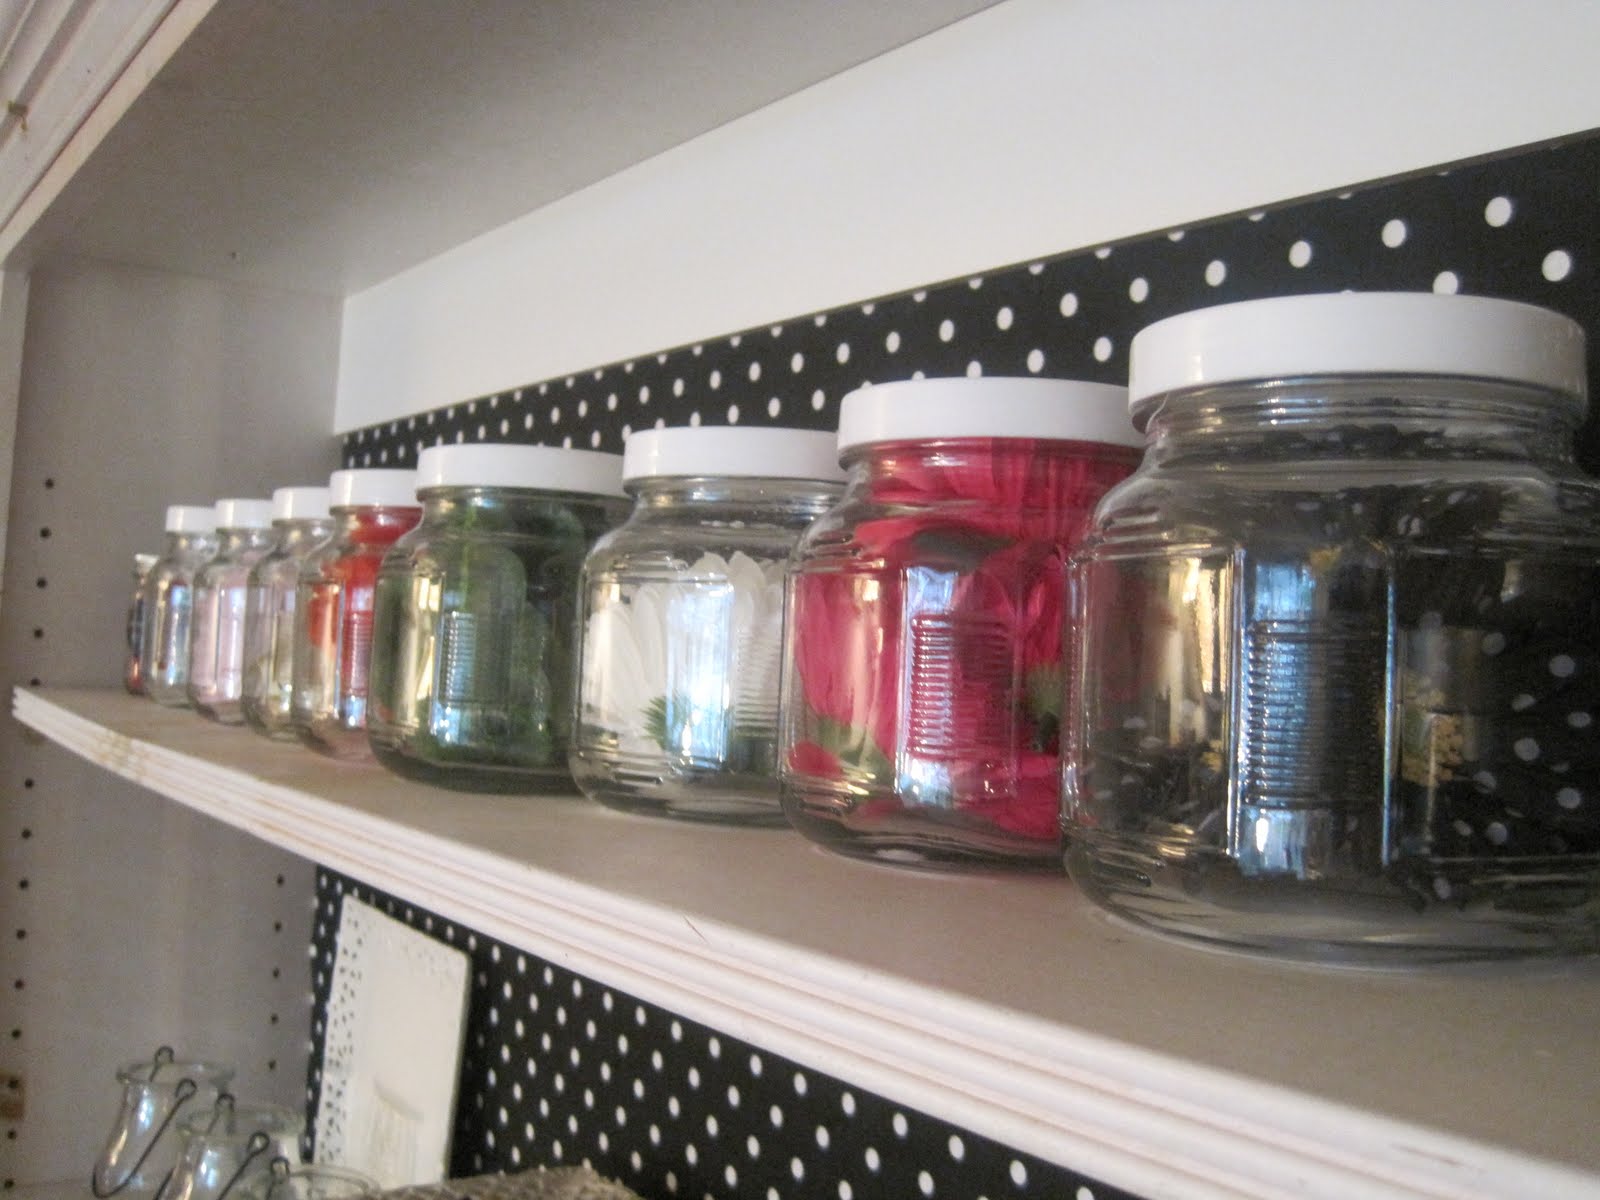
I store flowers in these jars.

Stuff! But necessary crafting STUFF.


Tools and embellishment storage.Office supplies.
Where I store my vinyl.


The work station where it all begins.
The printer and a storage cabinet full of scrapbook paper.


{Can you ever have too much scrapbook paper?}


The 'storage' armoire. This used to be what we had our television in. It makes a great place to store finished bazaar items in. Some of the finished items for the bazaar/craft show. I hope to have this bulging by November with finished crafts.

Lots of places for storing materials in this armoire.

So there you have it.
Do you want to come over and play sometime?
The End.